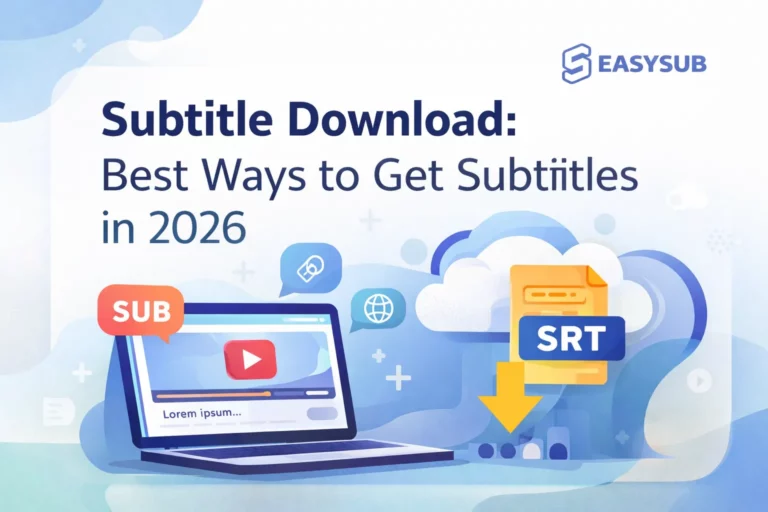
In den Bereichen Videoerstellung und Online-Bildung ist die automatische Untertitelung (Autocaption) mittlerweile Standard auf vielen Plattformen und Tools. Sie wandelt gesprochene Inhalte mithilfe von Spracherkennungstechnologie in Echtzeit in Untertitel um und hilft den Zuschauern so, Videoinformationen besser zu verstehen. Viele Nutzer stellen sich bei der Suche direkt die Kernfrage: Ist die Nutzung von Autocaption kostenlos? Dabei geht es nicht nur um die Nutzungsschwelle, sondern auch darum, ob für die Urheber zusätzliche Kosteninvestitionen erforderlich sind.
Allerdings sind nicht alle automatischen Untertitelungsdienste komplett kostenlos. Plattformen wie YouTube und TikTok bieten zwar grundlegende Gratisfunktionen, diese stoßen jedoch in puncto Genauigkeit, Exportmöglichkeiten oder Mehrsprachigkeit an ihre Grenzen. Für Videoblogger, Lehrkräfte und Unternehmen ist es daher entscheidend zu wissen, welche Dienste kostenlos sind und welche ein kostenpflichtiges Upgrade erfordern, um die Effektivität der Inhaltsverbreitung zu gewährleisten und Kosten zu senken. Dieser Artikel geht daher der Frage nach, ob automatische Untertitelung kostenlos ist, und hilft Lesern anhand der Eigenschaften verschiedener Plattformen, die passende Lösung zu finden.
Inhaltsverzeichnis
Was ist Autocaption?
Automatische Untertitelung ist der Prozess der automatischen Umwandlung von Sprache in Untertiteltext. Es basiert hauptsächlich auf ASR (Automatische Spracherkennung). Der grundlegende Prozess besteht normalerweise aus drei Schritten:
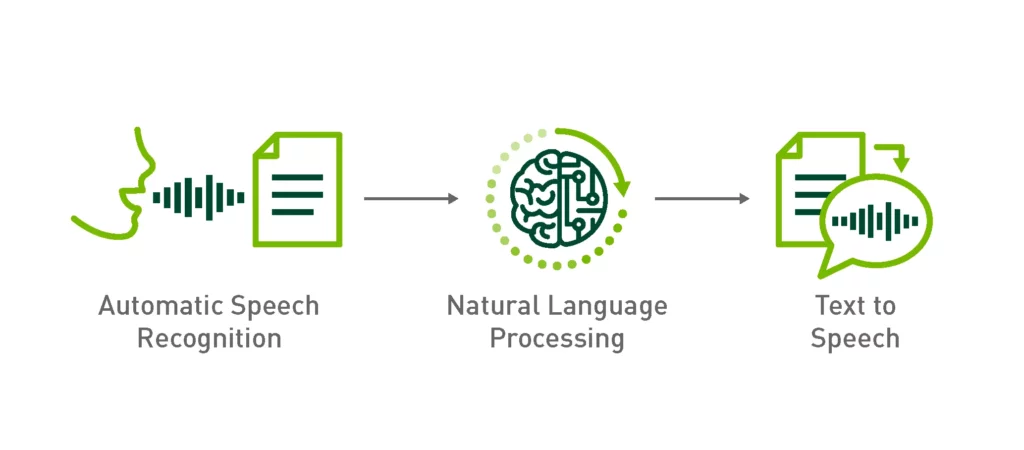
- Spracherkennung: Das Modell wandelt Sprache in wörtlichen Text um.
- Zeitleistenausrichtung: Generieren Sie Zeitstempel für jeden Satz oder jedes Wort.
- Untertitel-Rendering: Ausgabe an den Player gemäß Untertitelstandards oder Export als SRT/VTT und andere Formate. Zu den wichtigsten Faktoren für die Genauigkeit gehören: Audio-Abtastrate, Mikrofonqualität, Umgebungsgeräusche, Akzent und Terminologiebibliothek. Gute Aufnahmebedingungen können die Kosten für das Nachkorrekturlesen erheblich reduzieren.
a. Gemeinsame Quellen
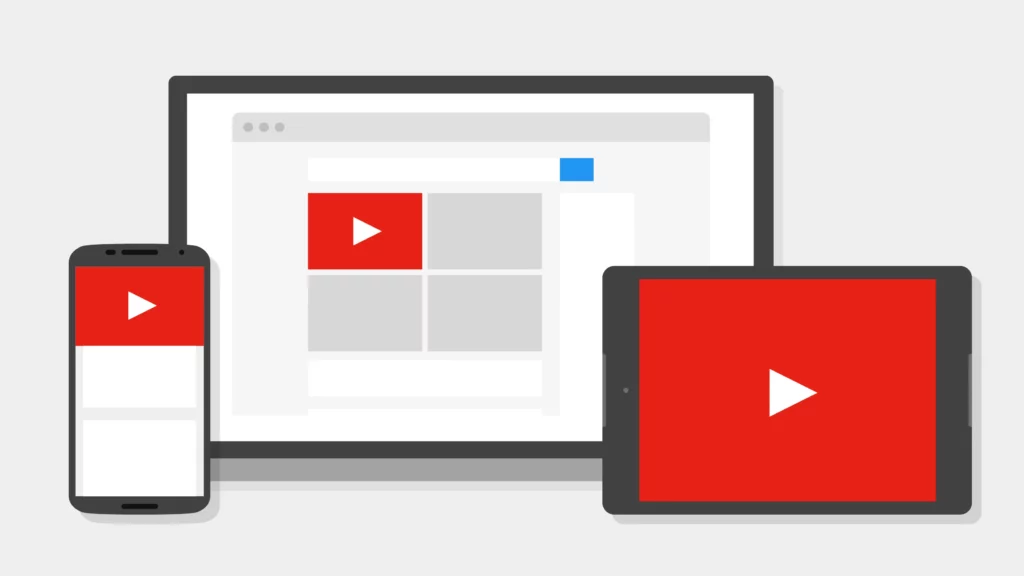
- Native Plattformen: Wie YouTube, TikTok, Google Meet und Zoom. Die Vorteile sind die Nullschwelle und die sofortige Nutzbarkeit; die Einschränkungen liegen jedoch in den eingeschränkten Exportformaten und Mehrsprachigkeits-/Übersetzungsfunktionen.
- SaaS von Drittanbietern: Wie zum Beispiel easysub. Es bietet einen umfassenderen Workflow: automatische Erkennung, Online-Korrekturlesen, Glossare, benutzerdefinierte Stile, SRT/VTT-Export, mehrsprachige Übersetzung und Teamzusammenarbeit. Es eignet sich für Teams, die plattformübergreifende Verteilung und stabile Ausgabe benötigen.
- Bearbeiten von Software-Plugins/Integrationen: Wie beispielsweise die in Premiere und CapCut integrierten. Der Vorteil ist die nahtlose Anbindung an die Schnittzeitleiste; für mehrsprachige Unterstützung, Stapelverarbeitung, Zusammenarbeit und Versionsverwaltung sind jedoch oft externe Dienste zur Ergänzung erforderlich.
b. Warum automatische Untertitel verwenden?
- Zugänglichkeit: Stellen Sie gehörlosen und schwerhörigen Benutzern sowie Benutzern, die Videos in Ruhe ansehen, gleichwertige Informationen zur Verfügung und erfüllen Sie dabei die Barrierefreiheitsanforderungen für Kurse, Unternehmen und öffentliche Inhalte.
- Steigern Sie die Abschlussrate und die Bindung: Untertitel können Verständnisschwierigkeiten aufgrund von Akzenten und lauten Umgebungen lindern und den Benutzern helfen, länger zuzusehen.
- Suche und Verbreitung (SEO/ASO): Durchsuchbarer Untertiteltext erleichtert die interne Plattformsuche und die Anzeige von Long-Tail-Keywords und verbessert so die Auffindbarkeit von Videos.
- Schulung und Compliance: In Bildungs-, Unternehmensschulungs- und Rechtskonformitätsszenarien, genaue Untertitel + nachvollziehbare Versionen sind unerlässlich; zur einfachen Archivierung und Überprüfung können Standardformate ausgegeben werden.
Ist die Nutzung von Autocaption kostenlos?
Die meisten Plattformen bieten “kostenlose automatische Untertitel“Die kostenlose Version bietet jedoch in der Regel nur grundlegende Erkennung und Anzeige. Für höhere Genauigkeit, mehrsprachige Übersetzung, Export von Untertiteldateien (SRT/VTT) und eine tiefe Integration mit Bearbeitungssoftware ist oft ein Upgrade auf eine kostenpflichtige Version oder der Einsatz professioneller Tools erforderlich. Nehmen wir die Plattform als Beispiel:
- YouTube bietet automatische Untertitel und ermöglicht die Überprüfung und Bearbeitung in Studio (geeignet für Anfänger- und Bildungsinhalte). Für die plattformübergreifende Verteilung oder das strenge Korrekturlesen ist es üblich, herunterladen/exportieren oder verwenden Sie Tools von Drittanbietern, um sie in Standardformate zu konvertieren.
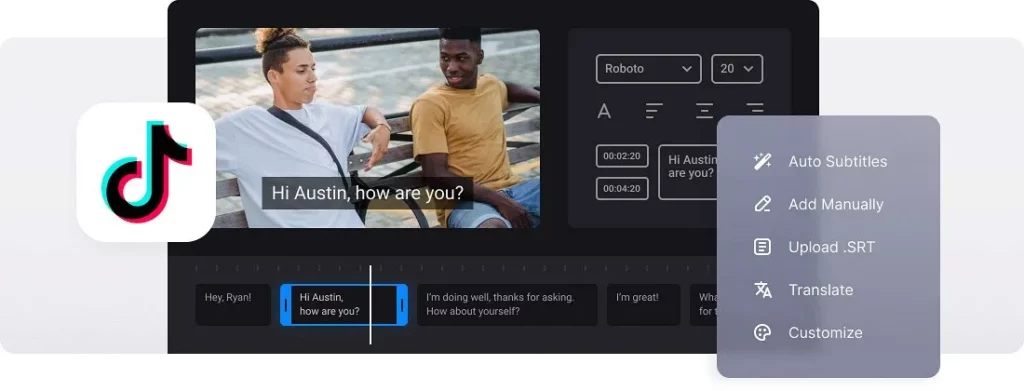
- TikTok Unterstützt nativ automatische Untertitel und Bearbeitung und eignet sich zum schnellen Hinzufügen von Untertiteln zu kurzen Videos. Allerdings bietet das offizielle Tool keinen SRT/VTT-Upload-/Export-Workflow. Wenn Standarddateien benötigt werden, werden in der Regel Tools von Drittanbietern (wie CapCut für den SRT/TXT-Export) verwendet.
- Zoom bietet die automatische Untertitelgenerierung für kostenlose Konten (geeignet für Live-Meeting-Szenarien); erweiterte Funktionen (wie umfassendere intelligente Zusammenfassungen, KI-Workflows) sind jedoch Teil der Premium-Suite.
- Google Meet verfügt standardmäßig über Echtzeit-Untertitel; während Untertitel für Übersetzungen werden seit dem 22.01.2025 hauptsächlich für Gemini/kostenpflichtige Add-ons (Enterprise-/Education-Versionen) bereitgestellt.
Warum "Kostenlos ≠ Völlig unbegrenzt"
- Sprache und Region: Kostenlose automatische Untertitel priorisieren eher die Abdeckung der gängigen Sprachen; Abdeckung und Qualität von Minderheitensprachen variieren. Nehmen wir Meet als Beispiel:, Übersetzung Untertitel fallen in die Premium-Kategorie.
- Dauer und Warteschlange: Bei langen Videos oder Uploads mit hoher Parallelität kann das Generieren oder Aktualisieren von Untertiteln langsamer sein (die Plattform kann keine Aktualität garantieren).
- Genauigkeit und Lesbarkeit: Akzent, mehrere gleichzeitig sprechende Personen, Lärm und Fachbegriffe können die Genauigkeit verringern; YouTube empfiehlt ausdrücklich, dass Schöpfer überprüfen und überarbeiten automatische Untertitel.
- Export und ZusammenarbeitViele “kostenlose automatische Untertitel” sind nur innerhalb der Plattform verfügbar; Standarddateien (SRT/VTT) Für den Export oder die plattformübergreifende Nutzung sind häufig Zahlungen oder die Verwendung von Tools von Drittanbietern erforderlich (z. B. CapCut/TikTok-Anzeigeneditor oder Workflow zum Herunterladen von Untertiteln).
Compliance und Szenarien
Wenn Sie die Standards für Barrierefreiheit und Konformität (wie z. B. WCAG) erfüllen oder barrierefreie Inhalte für gehörlose Nutzer bereitstellen müssen, reicht es oft nicht aus, sich allein auf kostenlose automatische Untertitel zu verlassen. Zusätzliche Schritte wie Korrekturlesen, Timeline-Korrektur und Formatexport sind notwendig, um die Anforderungen an Genauigkeit, Synchronisierung und Vollständigkeit zu erfüllen.
Wichtige Entscheidungspunkte
- Gewöhnliche Ersteller / Lehr- und Schulungsvideos: Kostenlose Untertitel innerhalb der Plattform + erforderliches manuelles Korrekturlesen → Dies reicht aus, um das Seherlebnis und die Suchsichtbarkeit zu verbessern; wenn eine plattformübergreifende Verteilung erforderlich ist, sollten zusätzliche Exportverfahren hinzugefügt werden.
- Unternehmensschulung / Mehrsprachiges Marketing / Szenarien für gesetzliche Anforderungen: Wählen Sie vorzugsweise eine integrierte Lösung, die unterstützt hochpräzise Erkennung + mehrsprachige Übersetzung + SRT/VTT-Export + Bearbeitungsintegration; Betrachten Sie “automatische Untertitel” als ersten Entwurf und kombinieren Sie diese mit professioneller Überprüfung und Versionsverwaltung.
“Kann es kostenlos genutzt werden?” Die Antwort lautet meist “Ja”, doch die entscheidende Frage ist: “Erfüllt es Ihre Workflow- und Qualitätsstandards?” Wenn Sie herunterladbare, bearbeitbare und wiederverwendbare Standard-Untertitel benötigen, empfiehlt sich die Kombination aus kostenloser Testversion und einem professionellen Tool mit erweiterten Funktionen (wie z. B. easysub). So erreichen Sie ein optimales Verhältnis zwischen Effizienz und Qualität.
Kostenlose vs. kostenpflichtige Funktionen in Autocaption Tools
Bei der Verwendung des Tools zur automatischen Untertitelung lautet die häufigste Frage der Benutzer: Was sind die Unterschiede zwischen der kostenlosen und der kostenpflichtigen Version? Wenn Entwickler und Unternehmen dies verstehen, können sie besser beurteilen, welches Modell für ihre Anforderungen besser geeignet ist.
- Kostenlose Version: Bietet normalerweise grundlegende Funktionen zur Untertitelgenerierung. Die unterstützten Sprachen sind begrenzt, und die Genauigkeit der Untertitel wird stark von der Audioqualität beeinflusst. Geeignet für Videoblogger-Anfänger oder Bildungsinhalte, die nur einfache Untertitel benötigen.
- Kostenpflichtige Version: Bietet umfassendere Funktionen. Beinhaltet hochpräzise Erkennung, mehrsprachige Übersetzung, Untertiteldateiexport (z. B. SRT, VTT) und Integration mit Videobearbeitungstools. Diese Funktionen verbessern die Professionalität und Bedienbarkeit von Untertiteln erheblich.
Szenariofall
Wenn normale Videoblogger kurze Videos hochladen, bietet die kostenlose Version bereits ausreichend Untertitel. Beim Exportieren der Untertiteldateien für plattformübergreifende Veröffentlichungen stoßen sie jedoch auf Einschränkungen. Für Unternehmensanwender, die Online-Schulungen durchführen oder Marketingvideos produzieren, sind nicht nur hohe Präzision und mehrsprachige Unterstützung, sondern auch komfortable Export- und Bearbeitungsfunktionen erforderlich. Für langfristige Anforderungen ist die kostenpflichtige Version daher die ideale Wahl.
Vergleich von Plattformen und Tools
Bei der Auswahl eines Tools für automatische Untertitelung achten Nutzer in der Regel vor allem auf die Kostenfreiheit und die Funktionseinschränkungen. Verschiedene Plattformen haben unterschiedliche Positionierungen und richten sich daher an unterschiedliche Nutzergruppen. Die folgende Vergleichstabelle fasst die Merkmale gängiger Plattformen und Tools zusammen und hilft Ihnen, schnell zu entscheiden, welches Ihren Anforderungen am besten entspricht.
| Plattform/Tool | Kostenlos oder nicht | Einschränkungen | Geeignete Benutzer |
|---|---|---|---|
| Automatische Untertitelung auf YouTube | Frei | Genauigkeit hängt von der Audioqualität ab, begrenzte Sprachoptionen | Allgemeine Ersteller, Lehrvideos |
| TikTok Autocaption | Frei | Untertiteldateien können nicht exportiert werden | Ersteller von Kurzvideos |
| Zoom / Google Meet | Kostenlose automatische Untertitelung, für einige erweiterte Funktionen ist jedoch ein Abonnement erforderlich | Export-/Übersetzungsfunktionen sind kostenpflichtig | Online-Meetings, E-Learning |
| Easysub (Markenhighlight) | Kostenlose Testversion + kostenpflichtiges Upgrade | Hochpräzise Untertitel, SRT-Export/-Übersetzung, mehrsprachige Unterstützung | Professionelle Entwickler, Geschäftsanwender |
Aus dem Vergleich geht hervor, dass die automatischen Untertitel von YouTube und TikTok für die normale Videoerstellung geeignet sind, jedoch Einschränkungen hinsichtlich Export und Genauigkeit aufweisen. Zoom und Google Meet eignen sich besser für Meeting-Szenarien, erfordern jedoch eine Zahlung, um die volle Funktionalität freizuschalten. Während Easysub kombiniert kostenlose Testversion Erfahrung mit professionellen Funktionen, ist es besonders geeignet für professionelle Benutzer, die mehrere Sprachen, hohe Genauigkeit und herunterladbare Untertitel.
Wie verwende ich die kostenlose automatische Untertitelung auf wichtigen Plattformen?
Im Folgenden werden die kostenlose automatische Untertitelaktivierung und die grundlegende Bearbeitung für vier gängige Plattformen Schritt für Schritt vorgestellt und auch die Exportbeschränkungen und häufigen Fallstricke aufgezeigt.
Erste Schritte und grundlegende Bearbeitung
- Gehe zu YouTube Studio → Untertitel.
- Warten Sie nach dem Hochladen des Videos, bis das System automatisch Titel generiert, wie z. B. Englisch (Automatisch).
- Wählen Sie im Untertitelbereich “Duplizieren & Bearbeiten”, überprüfen Sie den Text und die Zeitleiste und dann Veröffentlichen.
Export und Beschränkungen
- Sie können die Datei exportieren, indem Sie auf die Schaltfläche “⋯” rechts neben der Untertitelspur klicken und “Herunterladen” auswählen (für das .srt-/.txt-Format; dies gilt nur für Videos, die Ihnen gehören; falls keine Download-Option angezeigt wird, kann dies an unterschiedlichen Kontoeinstellungen liegen). Bei Bedarf können Sie Studio zum Exportieren oder ein kompatibles Drittanbieter-Tool zum Herunterladen verwenden.
- Häufige Fallstricke: Die Lesbarkeit automatischer Untertitel ist nicht stabil; die offizielle Empfehlung lautet: Führen Sie vor der Veröffentlichung ein manuelles Korrekturlesen durch.
Erste Schritte und grundlegende Bearbeitung
- Nehmen Sie das Video auf oder laden Sie es hoch und rufen Sie dann die Bearbeitungsoberfläche vor der Veröffentlichung auf.
- Klicken Sie auf die rechte Symbolleiste Untertitel, warten Sie auf die automatische Transkription; klicken Sie dann auf die Untertitel im Video → Untertitel bearbeiten um Änderungen vorzunehmen und zu speichern.
Export und Beschränkungen
- Der native Workflow bietet keine Möglichkeit, SRT/VTT-Dateien zu exportieren. Wenn Sie Standard-Untertiteldateien benötigen, können Sie in CapCut automatische Untertitel aktivieren und diese dann als SRT/TXT exportieren.
- Häufige Fehler: Untertitel, die nur innerhalb der App sichtbar sind, können nicht plattformübergreifend wiederverwendet werden. Wenn Sie sie auf mehreren Plattformen verteilen müssen, konvertieren Sie sie bitte in SRT/VTT.
③ Zoom (Konferenzszene)
Erste Schritte und grundlegende Bearbeitung
- Der Administrator oder die Einzelperson geht zu Zoom Webportal → Einstellungen → Im Meeting (Erweitert), und ermöglicht Automatische Untertitel.
- Klicken Sie während des Meetings auf das CC / Untertitel anzeigen Schaltfläche, um die Untertitel anzuzeigen. Der Gastgeber kann die automatischen Untertitel während des Meetings verwalten.
Export und Beschränkungen
- Während der Sitzung können Sie auswählen Transkript speichern im Transkriptionsbereich, und speichern Sie es als .txt. Dies ist eine Textspeicherung, nicht die Standard .srt Format mit Zeitcodes.
- Häufige Fallstricke: Kostenlose Konten bieten hauptsächlich Echtzeitanzeige; umfangreichere KI-Prozesse oder Aufzeichnungsfunktionen sind normalerweise in Premium-Paketen enthalten.
④ Google Meet (Untertitel in Echtzeit / Untertitelübersetzung)
Erste Schritte und grundlegende Bearbeitung
Klicken Sie in der Benutzeroberfläche auf Mehr → Einstellungen → Untertitel um Untertitel zu aktivieren; wenn Sie Übersetzte Untertitel, wählen Sie gleichzeitig die Ausgangssprache und die Zielsprache aus.
Export und Beschränkungen
- Echtzeit-Untertitel werden standardmäßig nicht als Dateien gespeichert. Transkripte (Konferenzprotokolle) sind nur für einige verfügbar kostenpflichtige Versionen von Google Workspace (wie z. B. Business Standard/Plus, Enterprise usw.), und die generierten Transkripte werden im Ordner des Veranstalters gespeichert. Google Drive.
- Häufige FallstrickeWenn es sich um ein privates Gratis-Konto handelt, Es wird keine Konferenzprotokolldateien geben; Sie benötigen ein Drittanbietertool oder eine aktualisierte Version.
FAQ
F1: Ist Autocaption auf allen Plattformen völlig kostenlos?
Nein. Die meisten Plattformen bieten kostenlose automatische Untertitel, aber dies sind meist grundlegende Funktionen. Es gibt oft Einschränkungen hinsichtlich der Anzahl der Sprachen, der Dauer, der Bearbeitung/des Exports, der Übersetzung usw. Fortgeschrittene Workflows erfordern in der Regel eine Zahlung oder professionelle Tool-Unterstützung.
F2: Kann ich mit der kostenlosen Autocaption-Software erstellte Untertitel herunterladen?
Das hängt von der Plattform ab. Bei manchen Plattformen und in manchen Szenarien können Untertiteldateien (wie SRT/VTT) aus dem Backend des Erstellers exportiert werden; bei anderen Plattformen werden sie hingegen nur auf der Website angezeigt. kann nicht direkt heruntergeladen werden. Wenn keine Exportmöglichkeit besteht, muss ein Drittanbieterprozess verwendet werden, oder die easysub Das Tool kann zum Exportieren in ein Standardformat verwendet werden, um die Wiederverwendung auf mehreren Plattformen zu vereinfachen.
F3: Sind kostenlose automatische Untertitel genau genug?
Es hängt von der Audioqualität, dem Akzent, dem Lärm und den Fachbegriffen ab. Das kostenlose Modell ist für Anfänger geeignet, aber seine Genauigkeit und Stabilität sind in der Regel nicht so gut wie professionelle Lösungen. Es wird empfohlen, die Zeitleiste manuell zu korrigieren und zu optimieren, um die Qualitätskontrollanforderungen für Kurse, Unternehmen oder Marketingszenarien zu erfüllen.
F4: Welches kostenlose Tool ist für Anfänger am besten geeignet?
Anfänger können mit den integrierten automatischen Untertiteln auf Plattformen wie YouTube/TikTok beginnen, um die Sichtbarkeit und die Abschlussraten schnell zu erhöhen. Wenn Sie Dateien exportieren, in mehrere Sprachen übersetzen, zusammenarbeiten und Vorlagenstile verwenden, können Sie auf professionelle Tools wie Easysub zurückgreifen, um wiederverwendbare Untertitel-Assets zu erstellen.
Für Benutzer, die suchen nach “Ist die Nutzung von Autocaption kostenlos?”, Easysub bietet eine Kombination aus Kostenlose Testversion + professionelle Funktionen. Sie können den Prozess zunächst kostenlos testen und bei Bedarf auf einen umfassenderen Workflow upgraden. Im Folgenden werden die Funktionen und die praktische Handhabung erläutert.
Kernvorteile
- Kostenlose TestversionEinfacher Einstieg. Sie können den gesamten Prozess von der “automatischen Transkription” bis zum “Export” abschließen, ohne im Voraus bezahlen zu müssen.
- Hochpräzise Erkennung + mehrsprachige Übersetzung: Deckt die wichtigsten Sprachen ab; unterstützt Terminologien, Vereinheitlichung von Personennamen, Markennamen und Branchenbegriffen.
- Export mit einem Klick: Standard SRT/VTT Formate, eingebettet zum Brennen; anwendbar für YouTube, Vimeo, LMS, soziale Medien und gängige Bearbeitungssoftware.
- Vollständiger Workflow: Online-Bearbeitung, gemeinsame Bearbeitung, Versionsverwaltung, Stapelverarbeitung; praktisch für die Überprüfung und Archivierung im Team.
- Zugänglichkeit und Vertriebsfreundlichkeit: Standardformate, klare Zeitpläne und Stilvorlagen, die die Einhaltung von Kursen/Unternehmen und die plattformübergreifende Wiederverwendbarkeit erleichtern.
-1024x500.png)
Schritt 1 – Registrieren Sie sich für ein kostenloses Konto
Klicken Sie auf “Registrieren”, legen Sie ein Passwort mit Ihrer E-Mail-Adresse fest oder registrieren Sie sich schnell mit Ihrem Google-Konto, um ein Passwort zu erhalten. kostenloses Konto.
Schritt 2 – Video- oder Audiodateien hochladen
Klicken Sie auf Projekt hinzufügen zum Hochladen von Videos/Audio; Sie können sie auswählen oder in das Upload-Feld ziehen. Es unterstützt auch das schnelle Erstellen von Projekten über die YouTube-Video-URL.
Schritt 3 – Automatische Untertitel hinzufügen
Nachdem der Upload abgeschlossen ist, klicken Sie auf Untertitel hinzufügen. Wählen Sie die Ausgangssprache und die gewünschte Zielsprache (optionale Übersetzung) und bestätigen Sie dann, um die automatischen Untertitel zu generieren.
Schritt 4 – Bearbeiten auf der Detailseite
Es ist innerhalb weniger Minuten abgeschlossen. Klicken Sie auf Bearbeiten um die Detailseite aufzurufen; in der Untertitelliste + Track-Wellenform In der Ansicht „Text“ können Sie Korrekturen vornehmen, die Zeichensetzung anpassen und die Zeitachse optimieren. Sie können auch Begriffe stapelweise ersetzen.
Schritt 5 – Exportieren und veröffentlichen
Wählen Sie basierend auf dem Veröffentlichungskanal: SRT/VTT herunterladen wird zum Hochladen oder Bearbeiten auf der Plattform verwendet;
Video mit eingebrannten Untertiteln exportieren wird für Kanäle verwendet, bei denen keine Untertiteldateien hochgeladen werden können;
Gleichzeitig können Sie Untertitelstil, Videoauflösung, Hintergrundfarbe, Wasserzeichen und Titel hinzufügen.
Kostenlos starten, intelligenter Untertiteln mit Easysub
Automatische Untertitel sind nicht immer “völlig kostenlos”. Verschiedene Plattformen unterscheiden sich hinsichtlich ihrer Funktionen erheblich. Sprachabdeckung, Exportformate, Genauigkeit und Zusammenarbeit. Kostenlose Funktionen sind für Anfänger und diejenigen geeignet, die innerhalb der Plattform sichtbar sind. Wenn Sie jedoch brauchen hohe Genauigkeit, mehrsprachige Übersetzung, SRT/VTT-Standardexport, Korrekturlesen im Team und Compliance-Rückverfolgbarkeit, indem Sie ein professionelles Werkzeug wählen, das beides bietet kostenlose Testversion + Upgrade ist zuverlässiger.
Warum Easysub wählen? Höhere Erkennungsrate, schnellere Bereitstellung; Export in ein Standardformat mit einem Klick; mehrsprachige Übersetzung und einheitliche Terminologie; Online-Bearbeitung und Versionsverwaltung, geeignet für langfristige Arbeitsabläufe von Kursen, Unternehmensschulungen und Marketingvideos.
Suchen Sie nach einer Möglichkeit, schnell hochpräzise Untertitel zu erstellen? Testen Sie sofort die kostenlose Version von Easysub. Es deckt den gesamten Prozess von der Generierung bis zum Export ab. Wenn Sie erweiterte Funktionen benötigen, Upgrade nach Bedarf.
👉 Klicken Sie hier für eine kostenlose Testversion: easyssub.com
Danke, dass Sie diesen Blog lesen. Bei weiteren Fragen oder Anpassungswünschen können Sie uns gerne kontaktieren!